

How to Add a Customer?
Follow the steps below to create and add a new customer.
Step 1:
Login into Mobiconnect with Owner/Admin credential and select your project.
https://www.mobiconnect.net/login
Step 2:
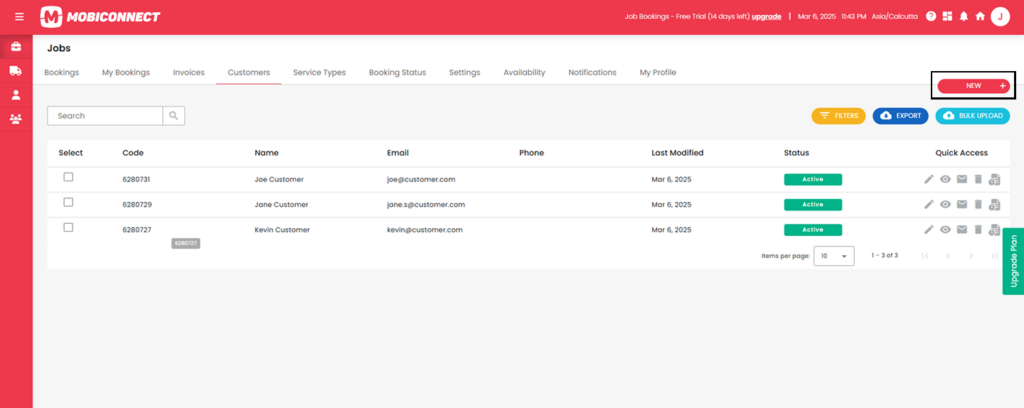
Navigate to the ‘Customers’ page by clicking on Customers from the menu.
Step 3:
Click on ‘New’ on the top right corner
Step 4:
In the ‘Add New Customer’ form: enter all Customer Details
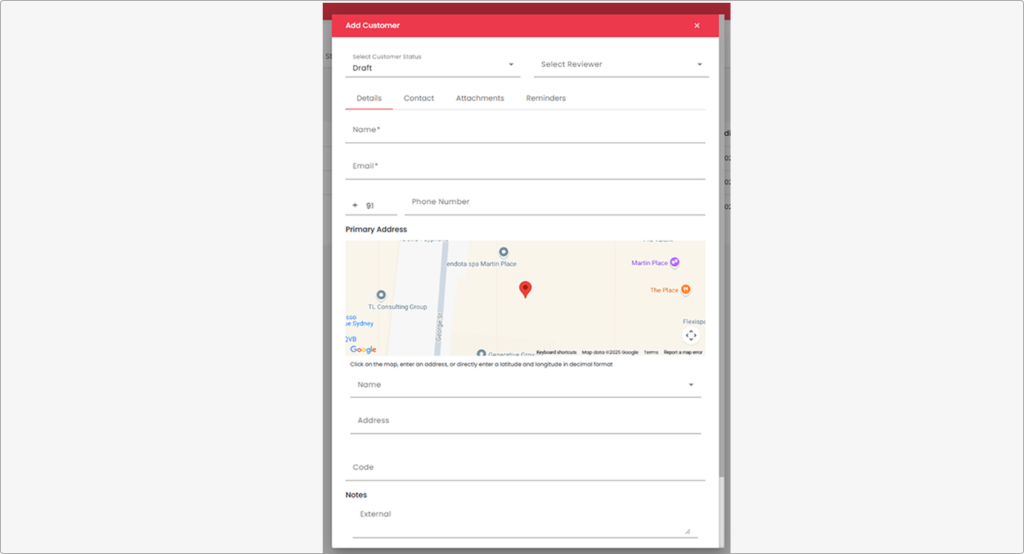
Info: Customer details
- Choose the appropriate status for the new customer from the dropdown menu. The default status is ‘Draft’ for a new customer.
- Enter the customer’s Name, Email, and Phone Number.
- Use the map to pinpoint the customer’s location by clicking on the desired spot or entering an address in the search bar. You can also manually input latitude and longitude if necessary.
- Select the name of the address, and enter address and code.
- Enter Notes and internal notes if required.
Step 5:
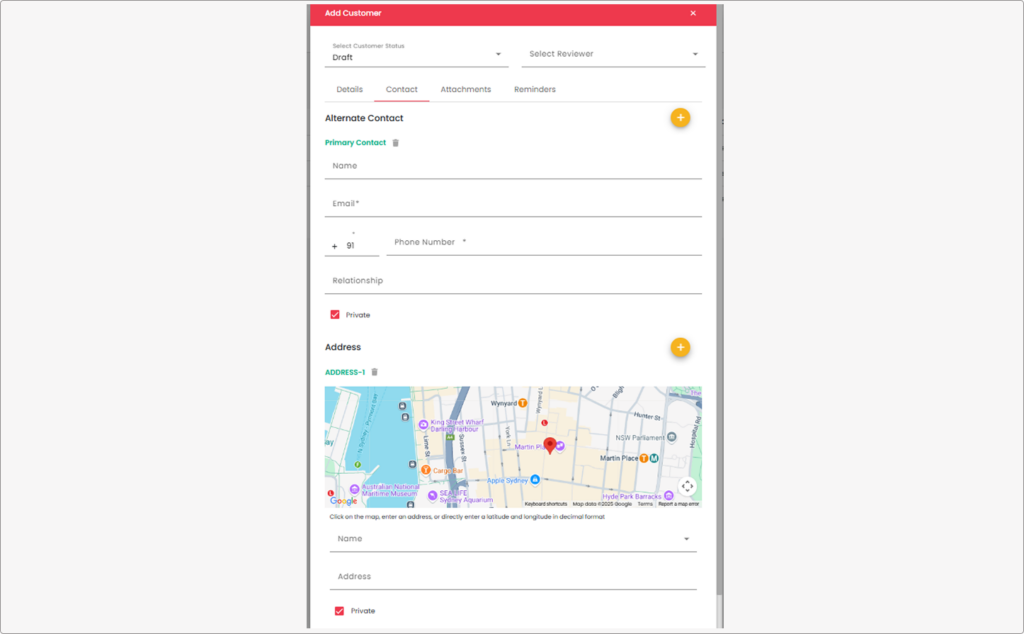
Navigate to the Contact tab and add Contact Details
Info :
If the customer has an alternate contact:
- Click the plus icon next to ‘Alternate Contact’.
- Fill in the details such as Name, Email, Phone Number, and Relationship.
- Mark the contact as ‘Private’ if this information should not be widely visible.
Add Additional Address
- Click the plus icon next to ‘No address for this customer yet, add one below’.
- Use the map to pinpoint the customer’s location by clicking on the desired spot or entering an address in the search bar. You can also manually input latitude and longitude if necessary.
- Select the name of the address, and enter the address and code.
- Mark the address as ‘Private’ if this information should not be widely visible.
Step 6:
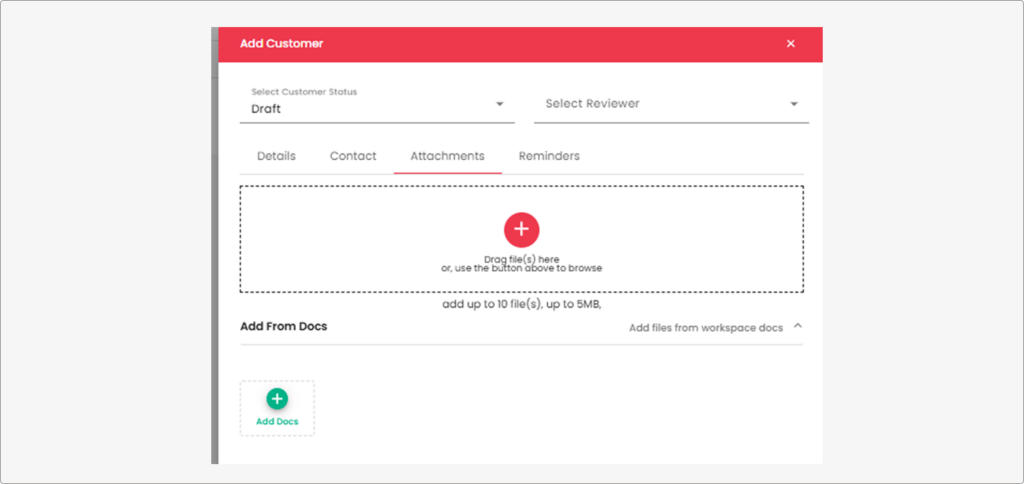
Navigate to the Attachments Tab.
- Drag and drop files into the designated area or use the button to browse and upload documents related to the customer.
- Use the ‘Add from Docs’ option if you need to attach documents already stored in your workspace.
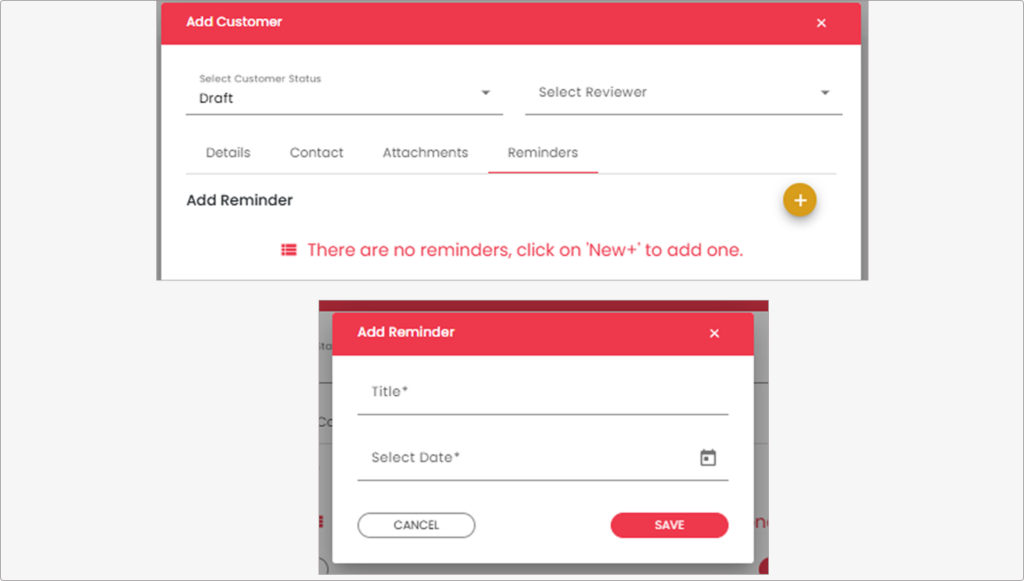
Step 7 :
Navigate to the Reminders tab.
Click on ‘Add Reminder’ to schedule reminders for the customer:
- Enter Title and Select Date.
- Click on save to add the reminder.
- Click on Cancel to close the form without saving
Step 8 :
You can edit, view, and delete the reminders under actions.
Click the ‘Create’ button to save the new customer into the system.
Click the ‘Cancel’ button , to close the form without saving .
