[vc_row type=”in_container” full_screen_row_position=”middle” column_margin=”default” column_direction=”default” column_direction_tablet=”default” column_direction_phone=”default” scene_position=”center” left_padding_desktop=”30px” right_padding_desktop=”120px” text_color=”dark” text_align=”left” row_border_radius=”none” row_border_radius_applies=”bg” overflow=”visible” overlay_strength=”0.3″ gradient_direction=”left_to_right” shape_divider_position=”bottom” bg_image_animation=”none” gradient_type=”default” shape_type=””][vc_column column_padding=”no-extra-padding” column_padding_tablet=”inherit” column_padding_phone=”inherit” column_padding_position=”all” column_element_direction_desktop=”default” column_element_spacing=”default” desktop_text_alignment=”default” tablet_text_alignment=”default” phone_text_alignment=”default” background_color_opacity=”1″ background_hover_color_opacity=”1″ column_backdrop_filter=”none” column_shadow=”none” column_border_radius=”none” column_link_target=”_self” column_position=”default” gradient_direction=”left_to_right” overlay_strength=”0.3″ width=”1/1″ tablet_width_inherit=”default” animation_type=”default” bg_image_animation=”none” border_type=”simple” column_border_width=”none” column_border_style=”solid”][vc_custom_heading text=”How to Manage Incidents ?” font_container=”tag:h2|font_size:34px|text_align:left|line_height:44px” use_theme_fonts=”yes” css=””][divider line_type=”Full Width Line” line_thickness=”1″ divider_color=”default” custom_height=”60px”][vc_column_text css=”” text_direction=”default”]Follow the steps below to edit, view, delete, or update Incidents.

Step 1: 
Login into Mobiconnect with valid credentials and select your project.
https://www.mobiconnect.net/login

Step 2:
Navigate to All Incidents page by Clicking “Incidents” from the main menu

Step 3:
Navigate to the quick access area of each Incident to perform various actions.[/vc_column_text][divider line_type=”No Line” custom_height=”15px”][image_with_animation image_url=”636″ image_size=”large” animation_type=”entrance” animation=”None” animation_movement_type=”transform_y” hover_animation=”none” alignment=”” border_radius=”10px” box_shadow=”none” image_loading=”default” max_width=”100%” max_width_mobile=”default”][divider line_type=”No Line” custom_height=”15px”][vc_column_text css=”” el_class=”custom-info-box” text_direction=”default”]
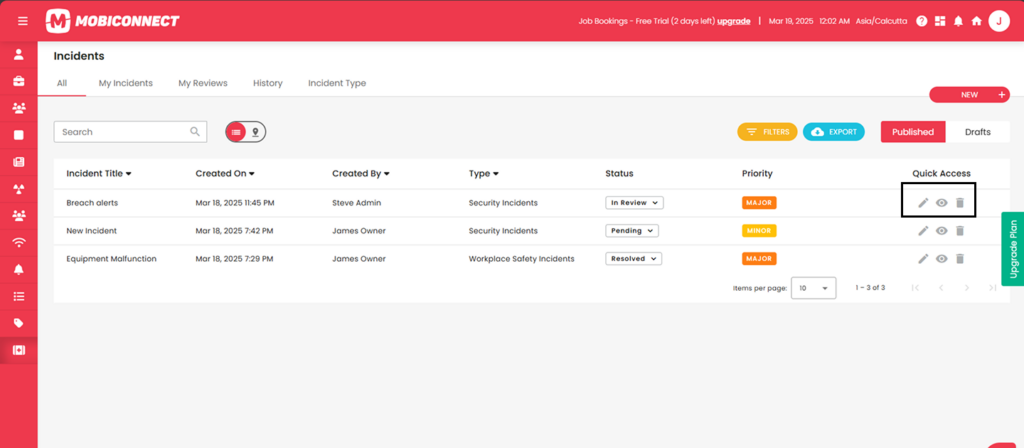
Info : Quick Actions

Edit :
Click on the pencil icon next to any Incident to edit its details. Modify the necessary details. Click on ‘Update’ to save the changes made to the Incident

View :
Click on the eye icon next to any incident to check its details.

Delete:
Click on the ‘trash can’ icon to delete a Incident.
A confirmation popup appears. Click “Yes” to confirm the deletion. The Incident will be removed from the list.
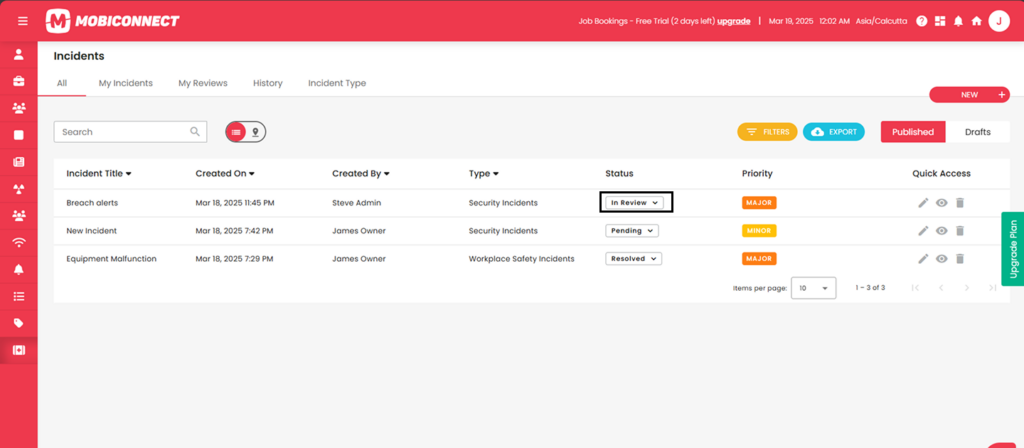
[/vc_column_text][divider line_type=”No Line” custom_height=”15px”][vc_column_text css=”” text_direction=”default”]Step 4:
Change the status of an Incident by selecting predefined options like ‘Accept’ or ‘Decline’, Closed , Approved from the dropdown under ‘Status’ of each Incident.[/vc_column_text][divider line_type=”No Line” custom_height=”15px”][image_with_animation image_url=”637″ image_size=”large” animation_type=”entrance” animation=”None” animation_movement_type=”transform_y” hover_animation=”none” alignment=”” border_radius=”10px” box_shadow=”none” image_loading=”default” max_width=”100%” max_width_mobile=”default”][divider line_type=”No Line” custom_height=”15px”][/vc_column][/vc_row]