How to create a New Job/Booking?
Follow the steps below to create and configure a new job booking.
Step 1:
Login into Mobiconnect with Owner/Admin credential and select your project.
https://www.mobiconnect.net/login
Step 2:
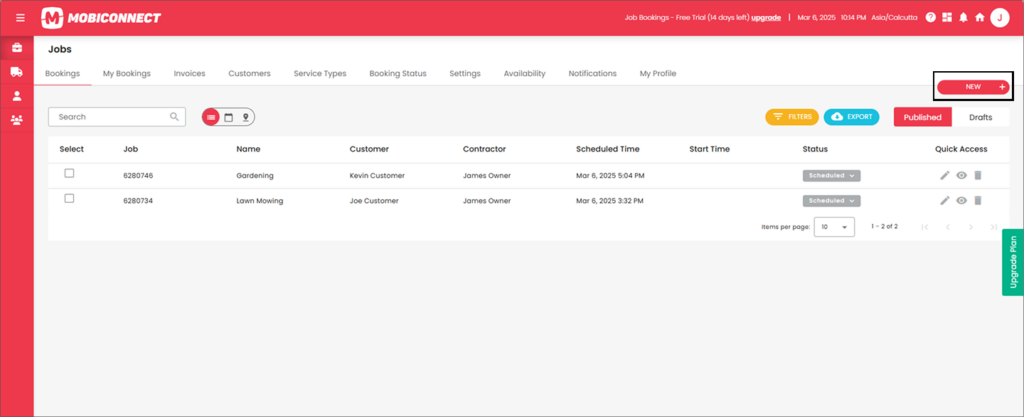
Navigate to Bookings page by Clicking “Jobs” from the main menu
Step 3:
Click on the ‘New’ button at the top right to open the New Booking form.
Step 4:
On the New Booking Pop-up, fill all the details, attach any required documents and add notes if necessary.

Info: Details Tab
- Click on ‘Select Customer’ and ‘Select Contractor’ to assign individuals to the booking.
- Enter a title for the booking.
- For multiple-day bookings, check the box for ‘Multiple day booking,’ and the system will display fields to select the start and expiry dates.
- For a single-day booking, specify the start date, start time, and duration.
- Check the box for ‘Allow before start time’ if the job can start earlier than scheduled.
- Choose the type of booking from the dropdown and select any parent jobs if applicable.
- Set the booking as recurring or not. If recurring, select one of the predefined recurring timelines.
- Choose if the job has pickup and delivery addresses from the dropdown.
Step 5:
Click on the ‘Add’ button and enter location details by entering the name and address. Choose and select other settings to create a new job
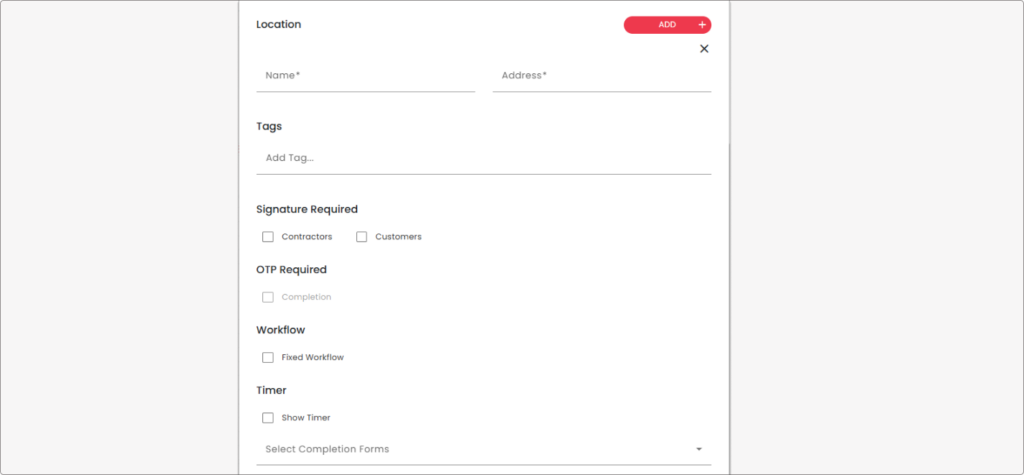
Info : Add Location and Other Settings of Details Tab
- You can add multiple addresses by clicking on the ‘Add’ button again.
- Enter any relevant tags to further categorise the bookings.
- Choose if signatures are required for contractors and customers upon job completion and after receiving the job, respectively.
- Check the box if OTP is required for completion of the job.
- Check the box if following a fixed workflow is necessary.
- Choose to show a timer during the job if needed.
- Completion Forms: Select any forms that need to be completed upon job completion if linked.
Step 6:
Navigate to the ‘Attach Documents’ tab.
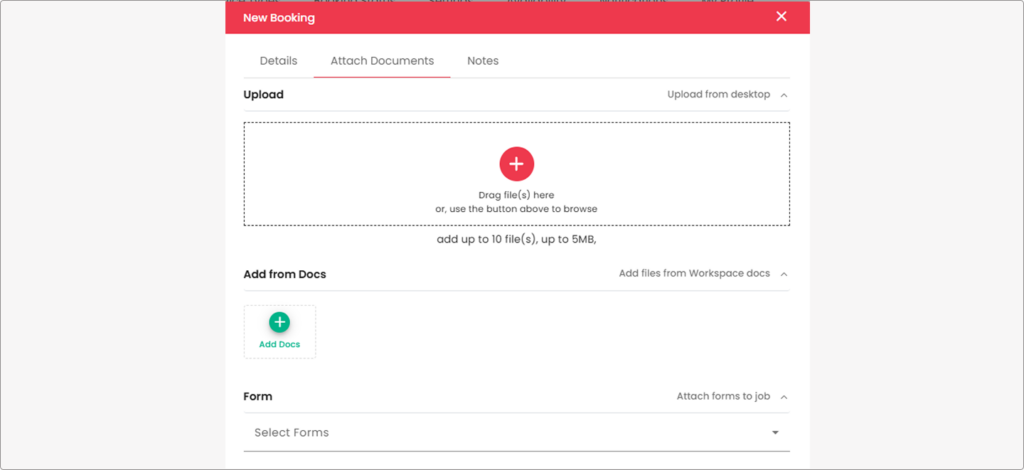
Info: Attachments
- Drag and drop files into the upload area or use the ‘Upload from desktop’ button to add documents.
- Click on ‘Add from Docs’ to include documents from connected storage or previous jobs.
- Click on ‘Forms’ to select any forms that need to be attached.
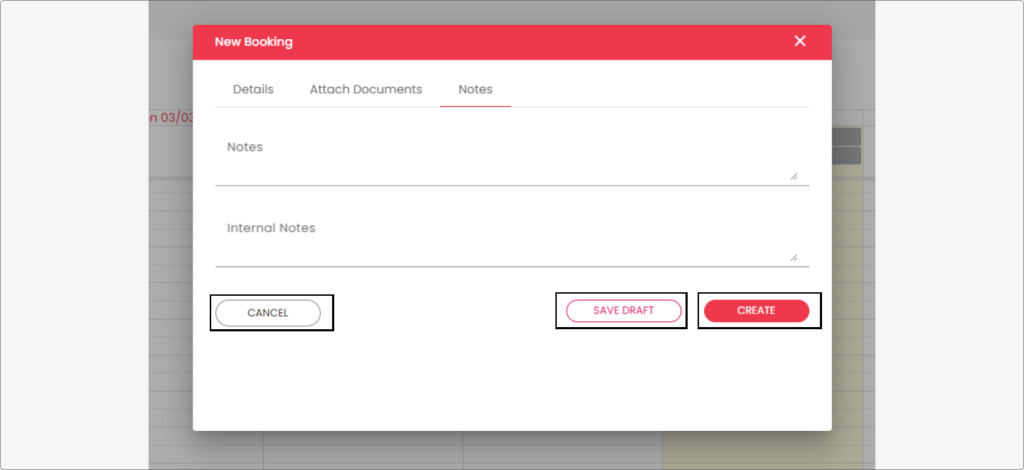
Step 7:
Navigate to the ‘Notes’ tab in New Booking Pop-up
Enter any notes and internal notes relevant to the booking for additional information.
- Click on ‘Save Draft’ to save the booking for later review.
- Click on ‘Create’ to activate the booking .
- Click on ‘Cancel’ to remove the booking without saving.